Week 6 Overview
Welcome to Week 6. This week's lesson content is lighter than previous weeks — your main focus should be on completing your course project.
On the learning side, you will pick up version control using Git and GitHub — the standard way developers track changes, collaborate, and publish projects. You will set up GitHub Desktop, push your project to GitHub, and connect your repository to Netlify for automatic deployment.
What you need this week:
- A GitHub account
- GitHub Desktop
- Cursor or your preferred code editor
- Netlify or similar web hosting service
Version Control and GitHub
Introduction
Actions in GitHub: Commit, Push, Pull, and Revert
GitHub Desktop
Install GitHub Desktop
The installation of GitHub Desktop is as simple as normal software. Following three videos will guide you through the process:
Making the First Commit and Push
Files and Folders that Should Not Be Committed
Not everything in your project folder should be saved in version control. Some files are private, some are too large, and some can be regenerated automatically.
What to exclude:
node_modules/— This folder contains tens of thousands of files installed by npm. It is regenerated by runningnpm install, so there is no reason to store it. Committing it would make your repository extremely slow..env— This file stores your API keys and secrets (like your Supabase key). If you push this to GitHub, anyone can see your keys. Never commit this file.dist/orbuild/— These are generated output folders. They can be rebuilt from your source code..DS_Store— A macOS system file. Not harmful, but unnecessary clutter.
How to exclude them:
Create a file called .gitignore in the
root of your project. List the files and folders you want Git to ignore, one per line:
node_modules/
.env
dist/
.DS_Store
Usually AI agents will generate a .gitignore file
for you when you initialize a project. If yours didn't, ask your agent: "Add a
.gitignore file for this project if it does not exist."
Publish from GitHub
In previous weeks, you published your apps by dragging a folder to Netlify. That works, but it means you have to manually re-upload every time you make a change.
A better workflow: connect your GitHub repository to Netlify. Once connected, every time you push to GitHub, Netlify automatically rebuilds and publishes your site. No dragging, no uploading — just push and it's live.
Demo: Publish from GitHub to Netlify
This video contains the demonstration of adding API keys or other secrets to Netlify. If you integrate backend services like Supabase, Cursor will set this up in your code, in a file named '.env'. But you will need to add the secrets manually to Netlify during the deployment process. See the video for more details.
Project Demo: Commit and Push Changes to GitHub
Extra: GitHub Education Benefits
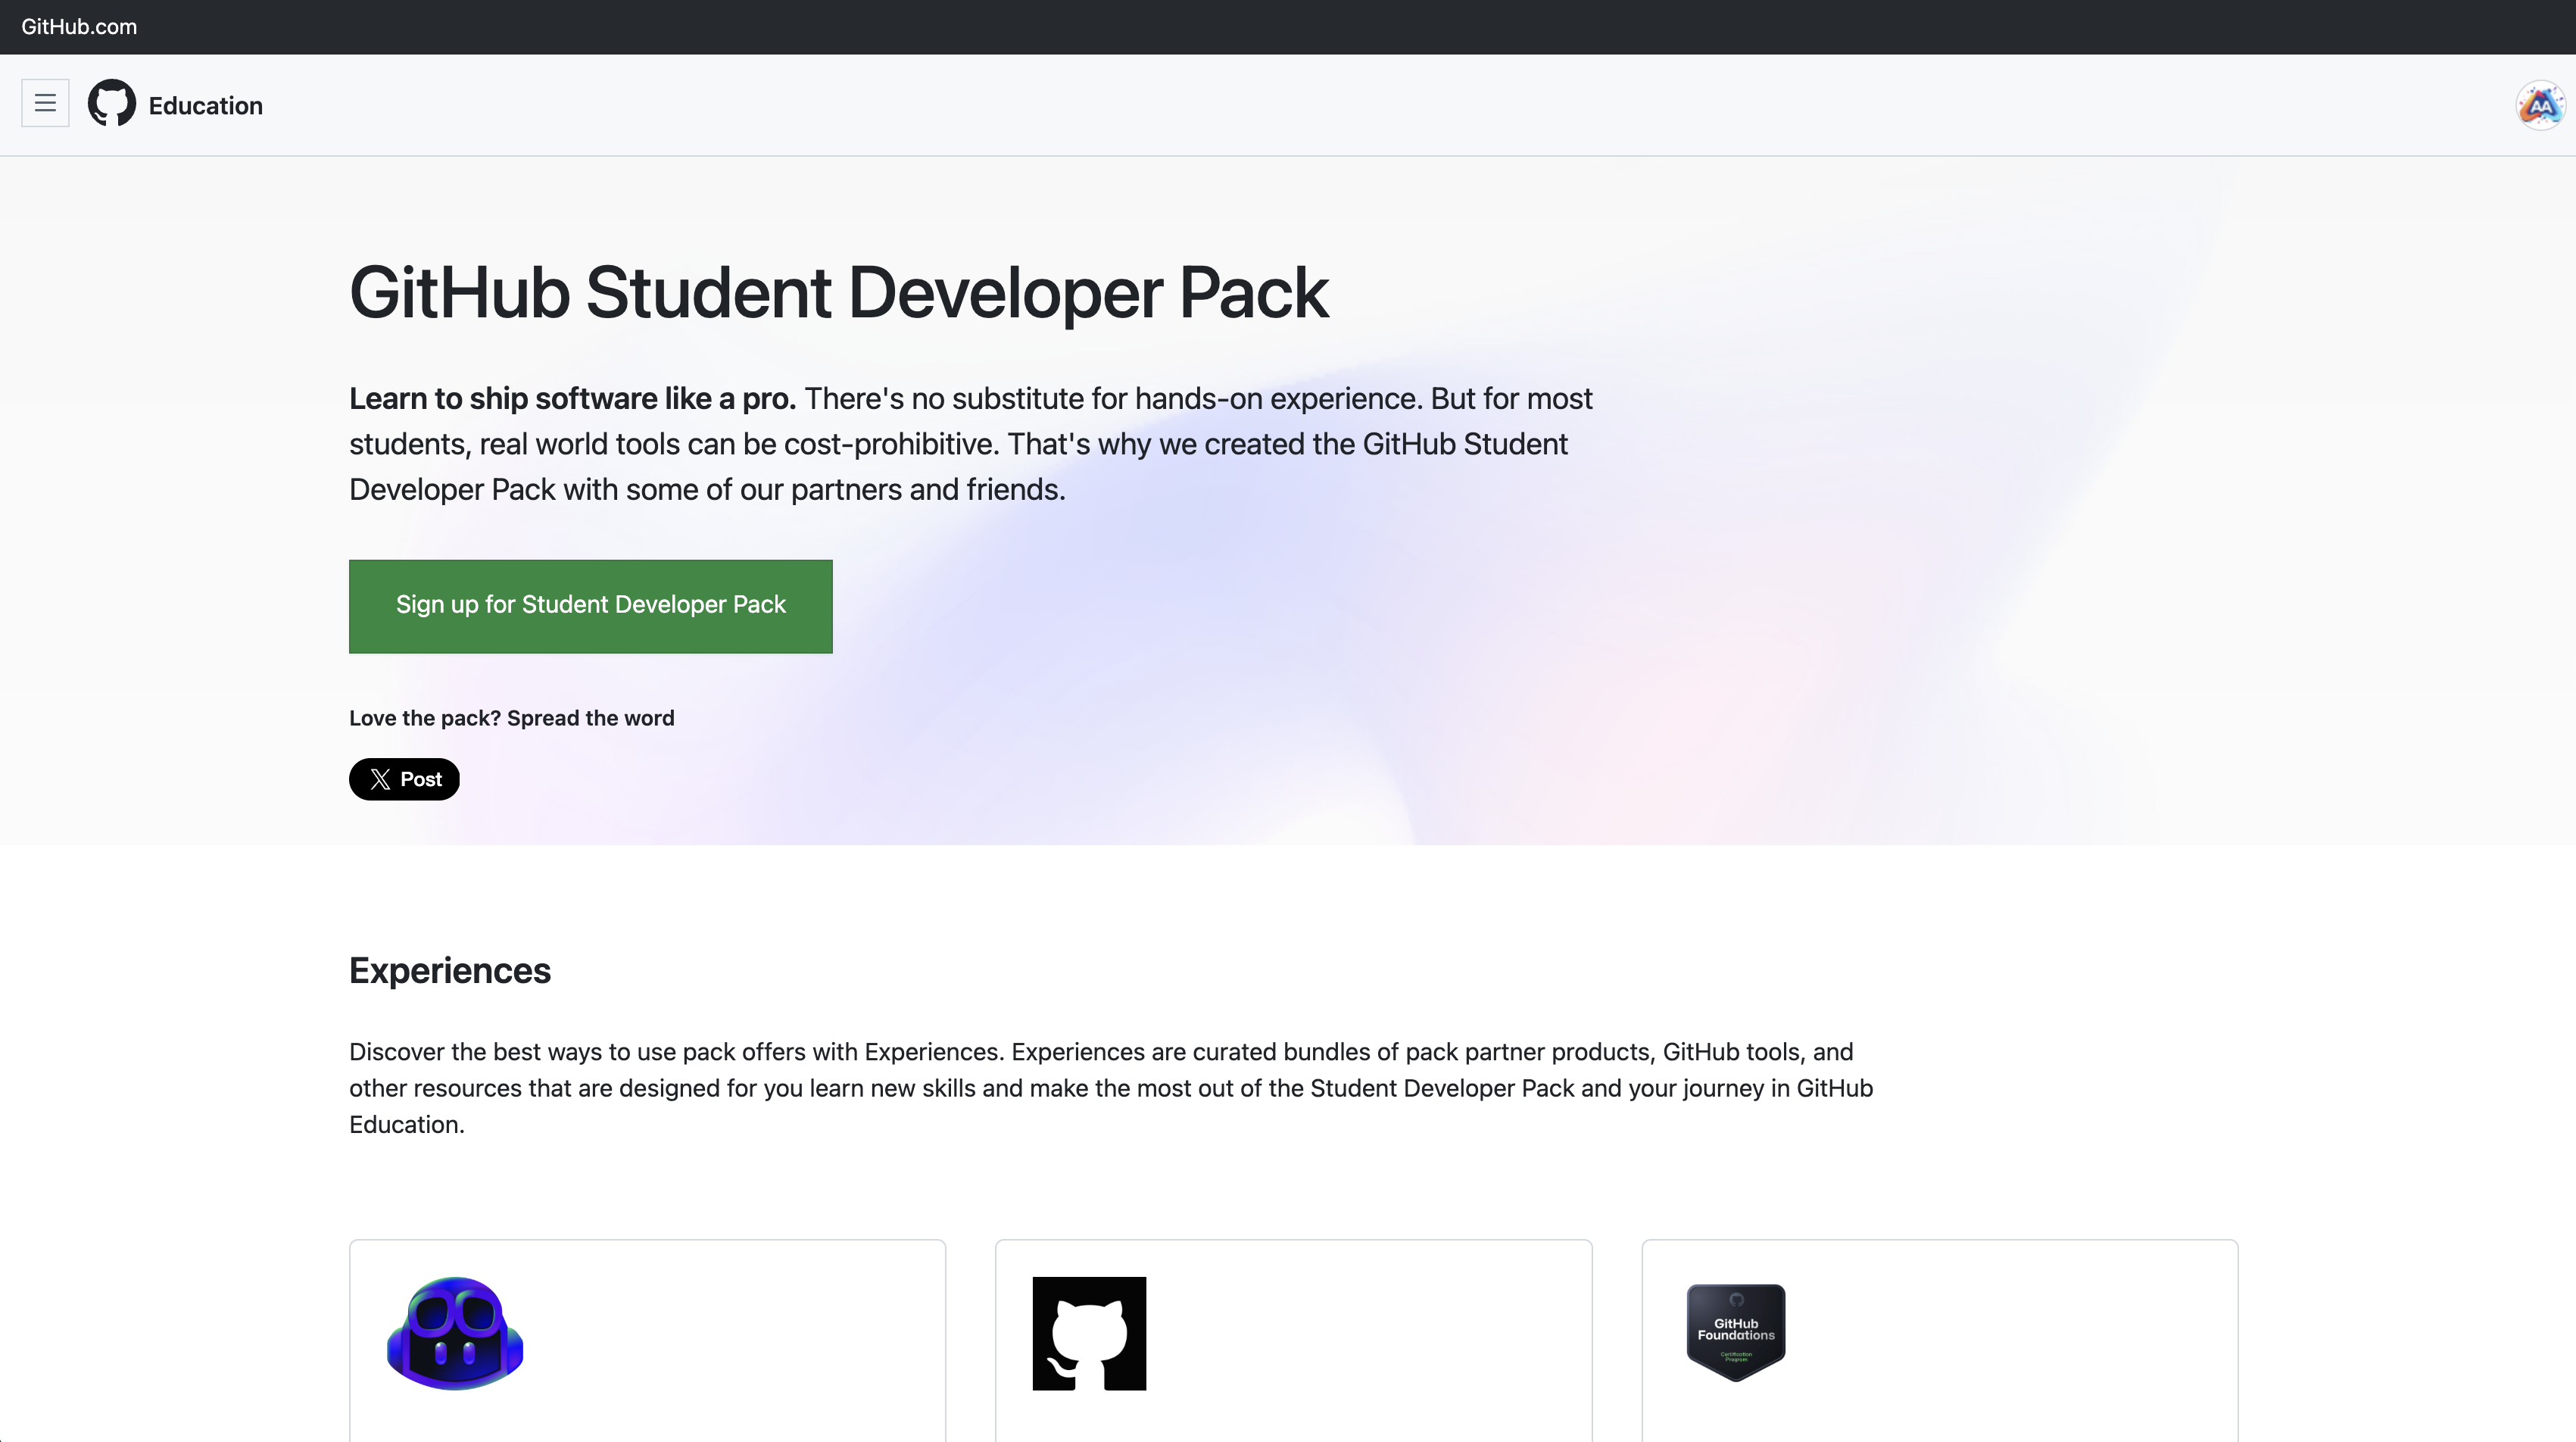
As a student, you can apply for the GitHub Student Developer Pack — a free bundle of tools and services. The most relevant benefits:
- GitHub Pro — free while you are a student (private repositories, advanced features)
- GitHub Copilot — free AI code assistant built into VS Code and Cursor
- Free domain names and cloud credits from various partner services
Apply at: https://education.github.com/pack
You will need a school email address (.edu) to verify
your student status. Approval usually takes a few days.
Project Collaboration
Invite Collaborators to Your GitHub Repository
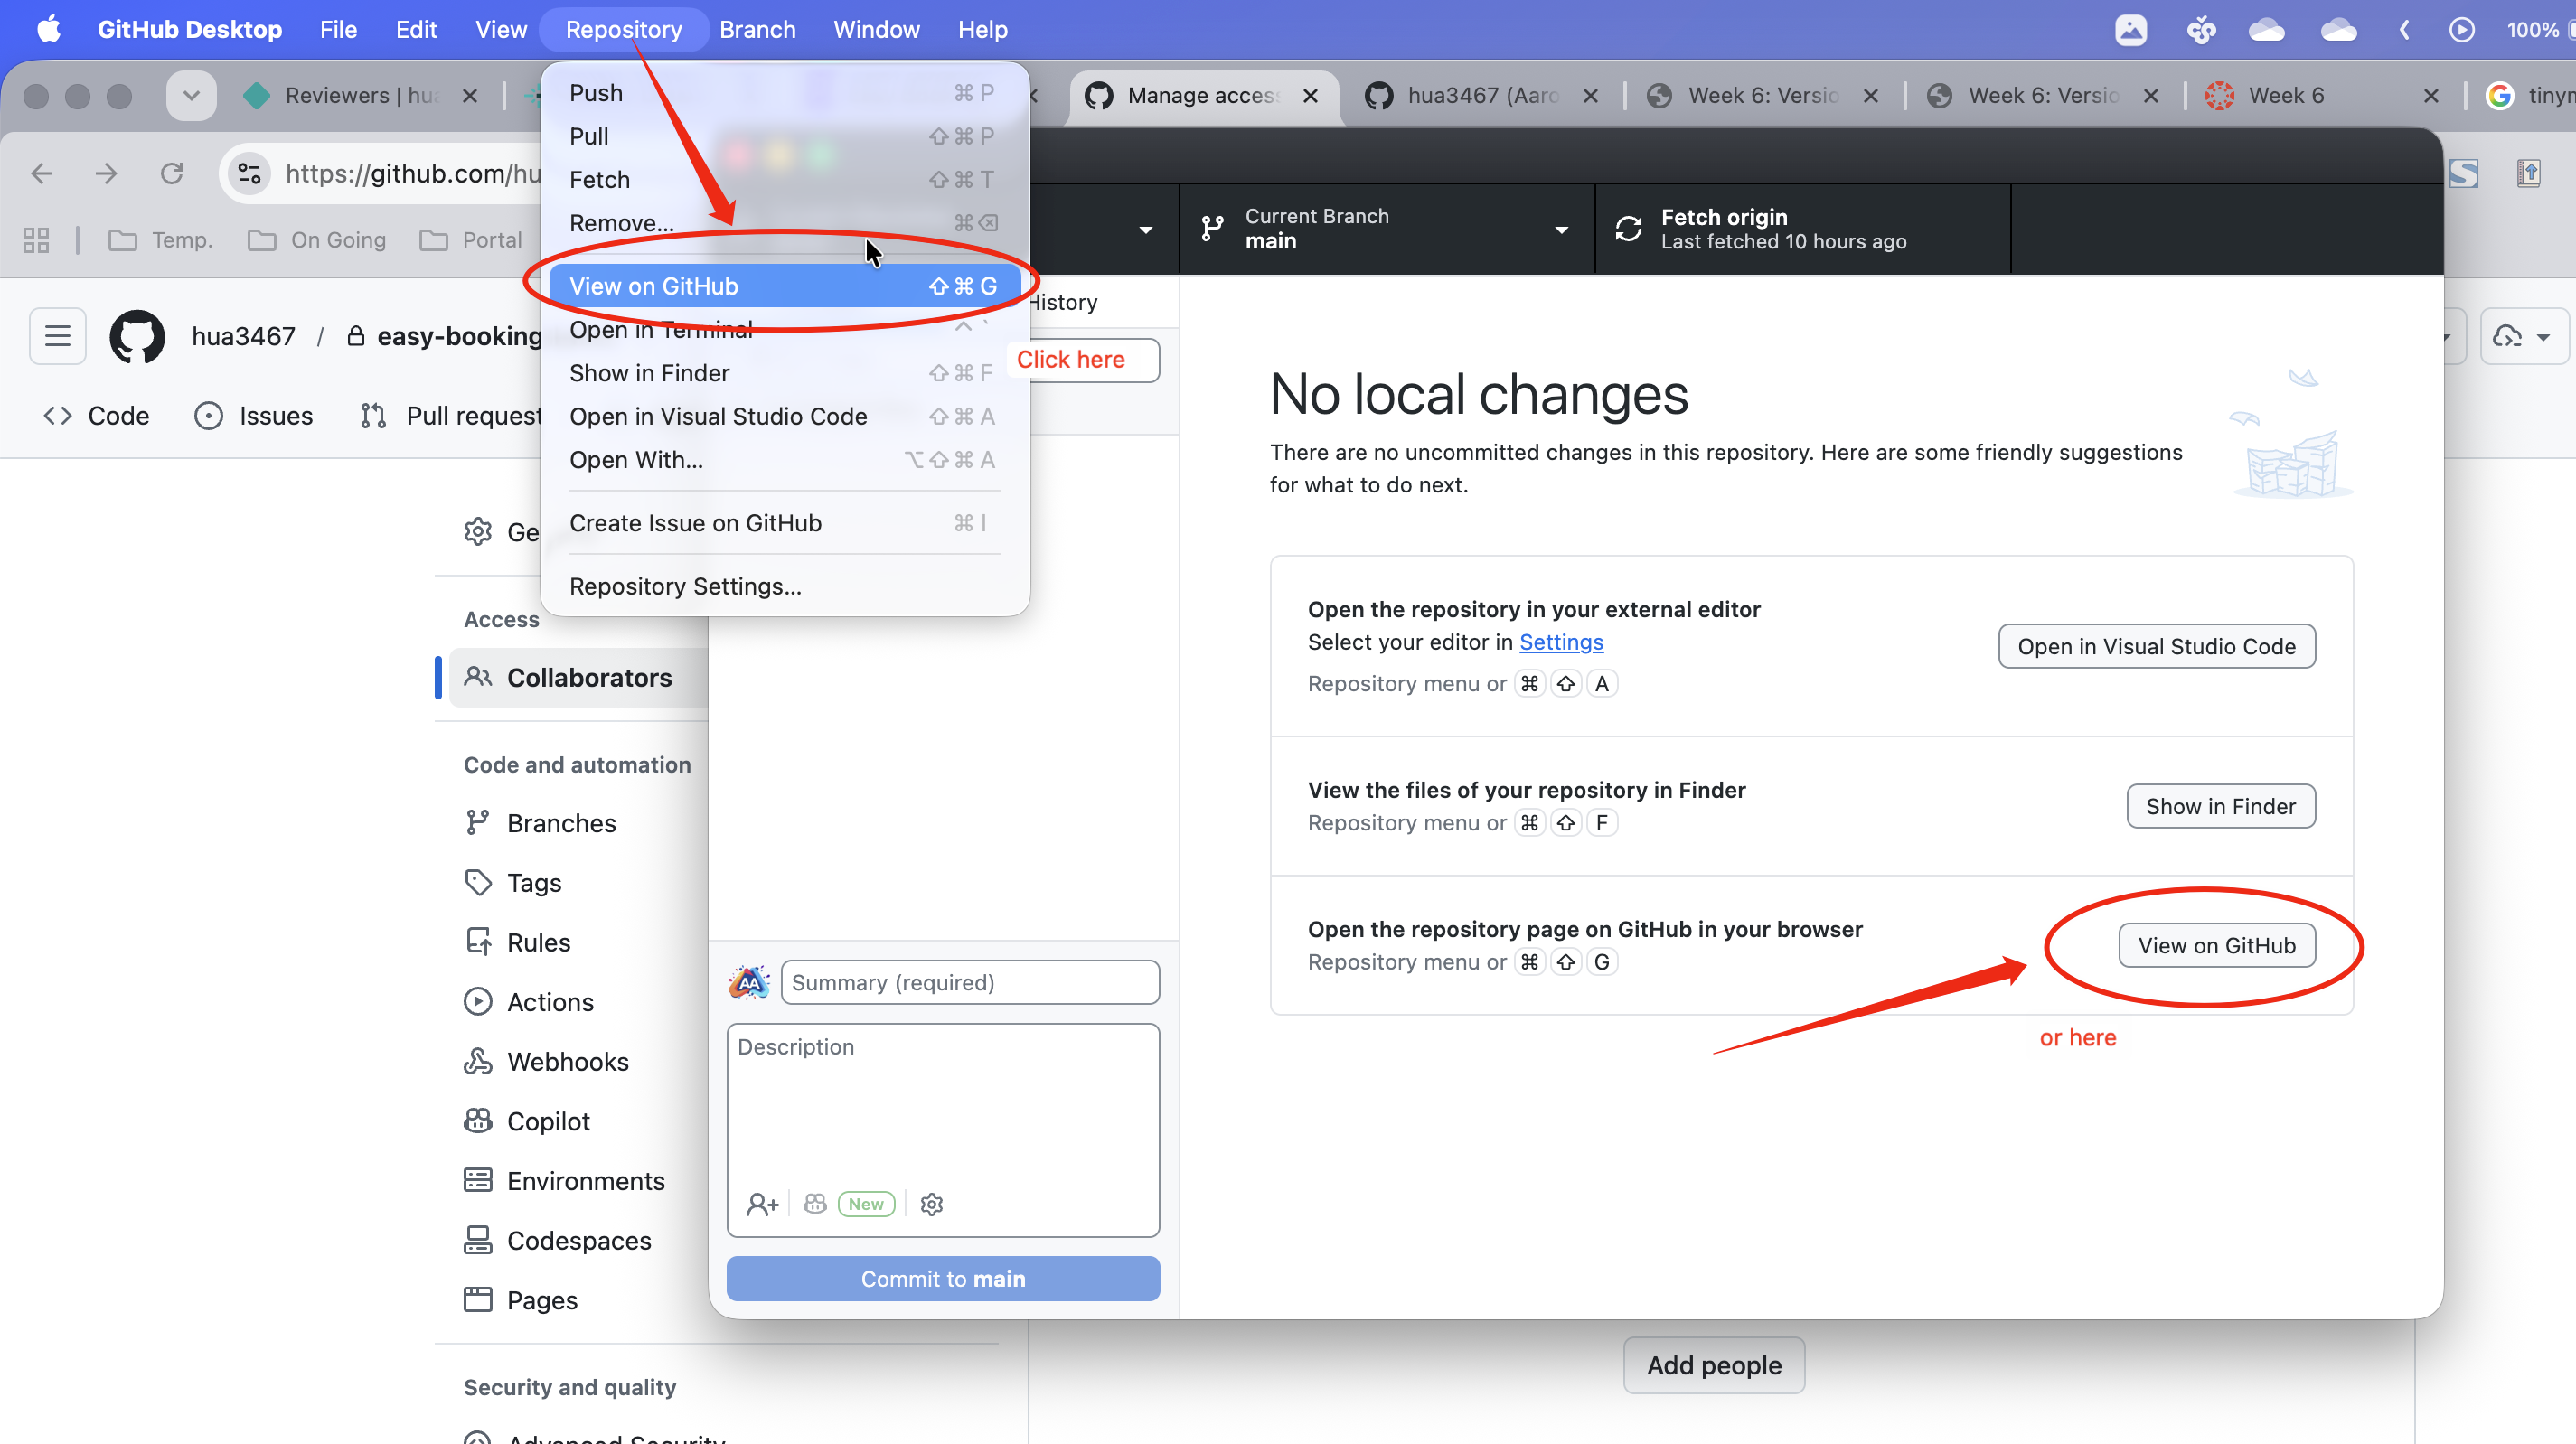
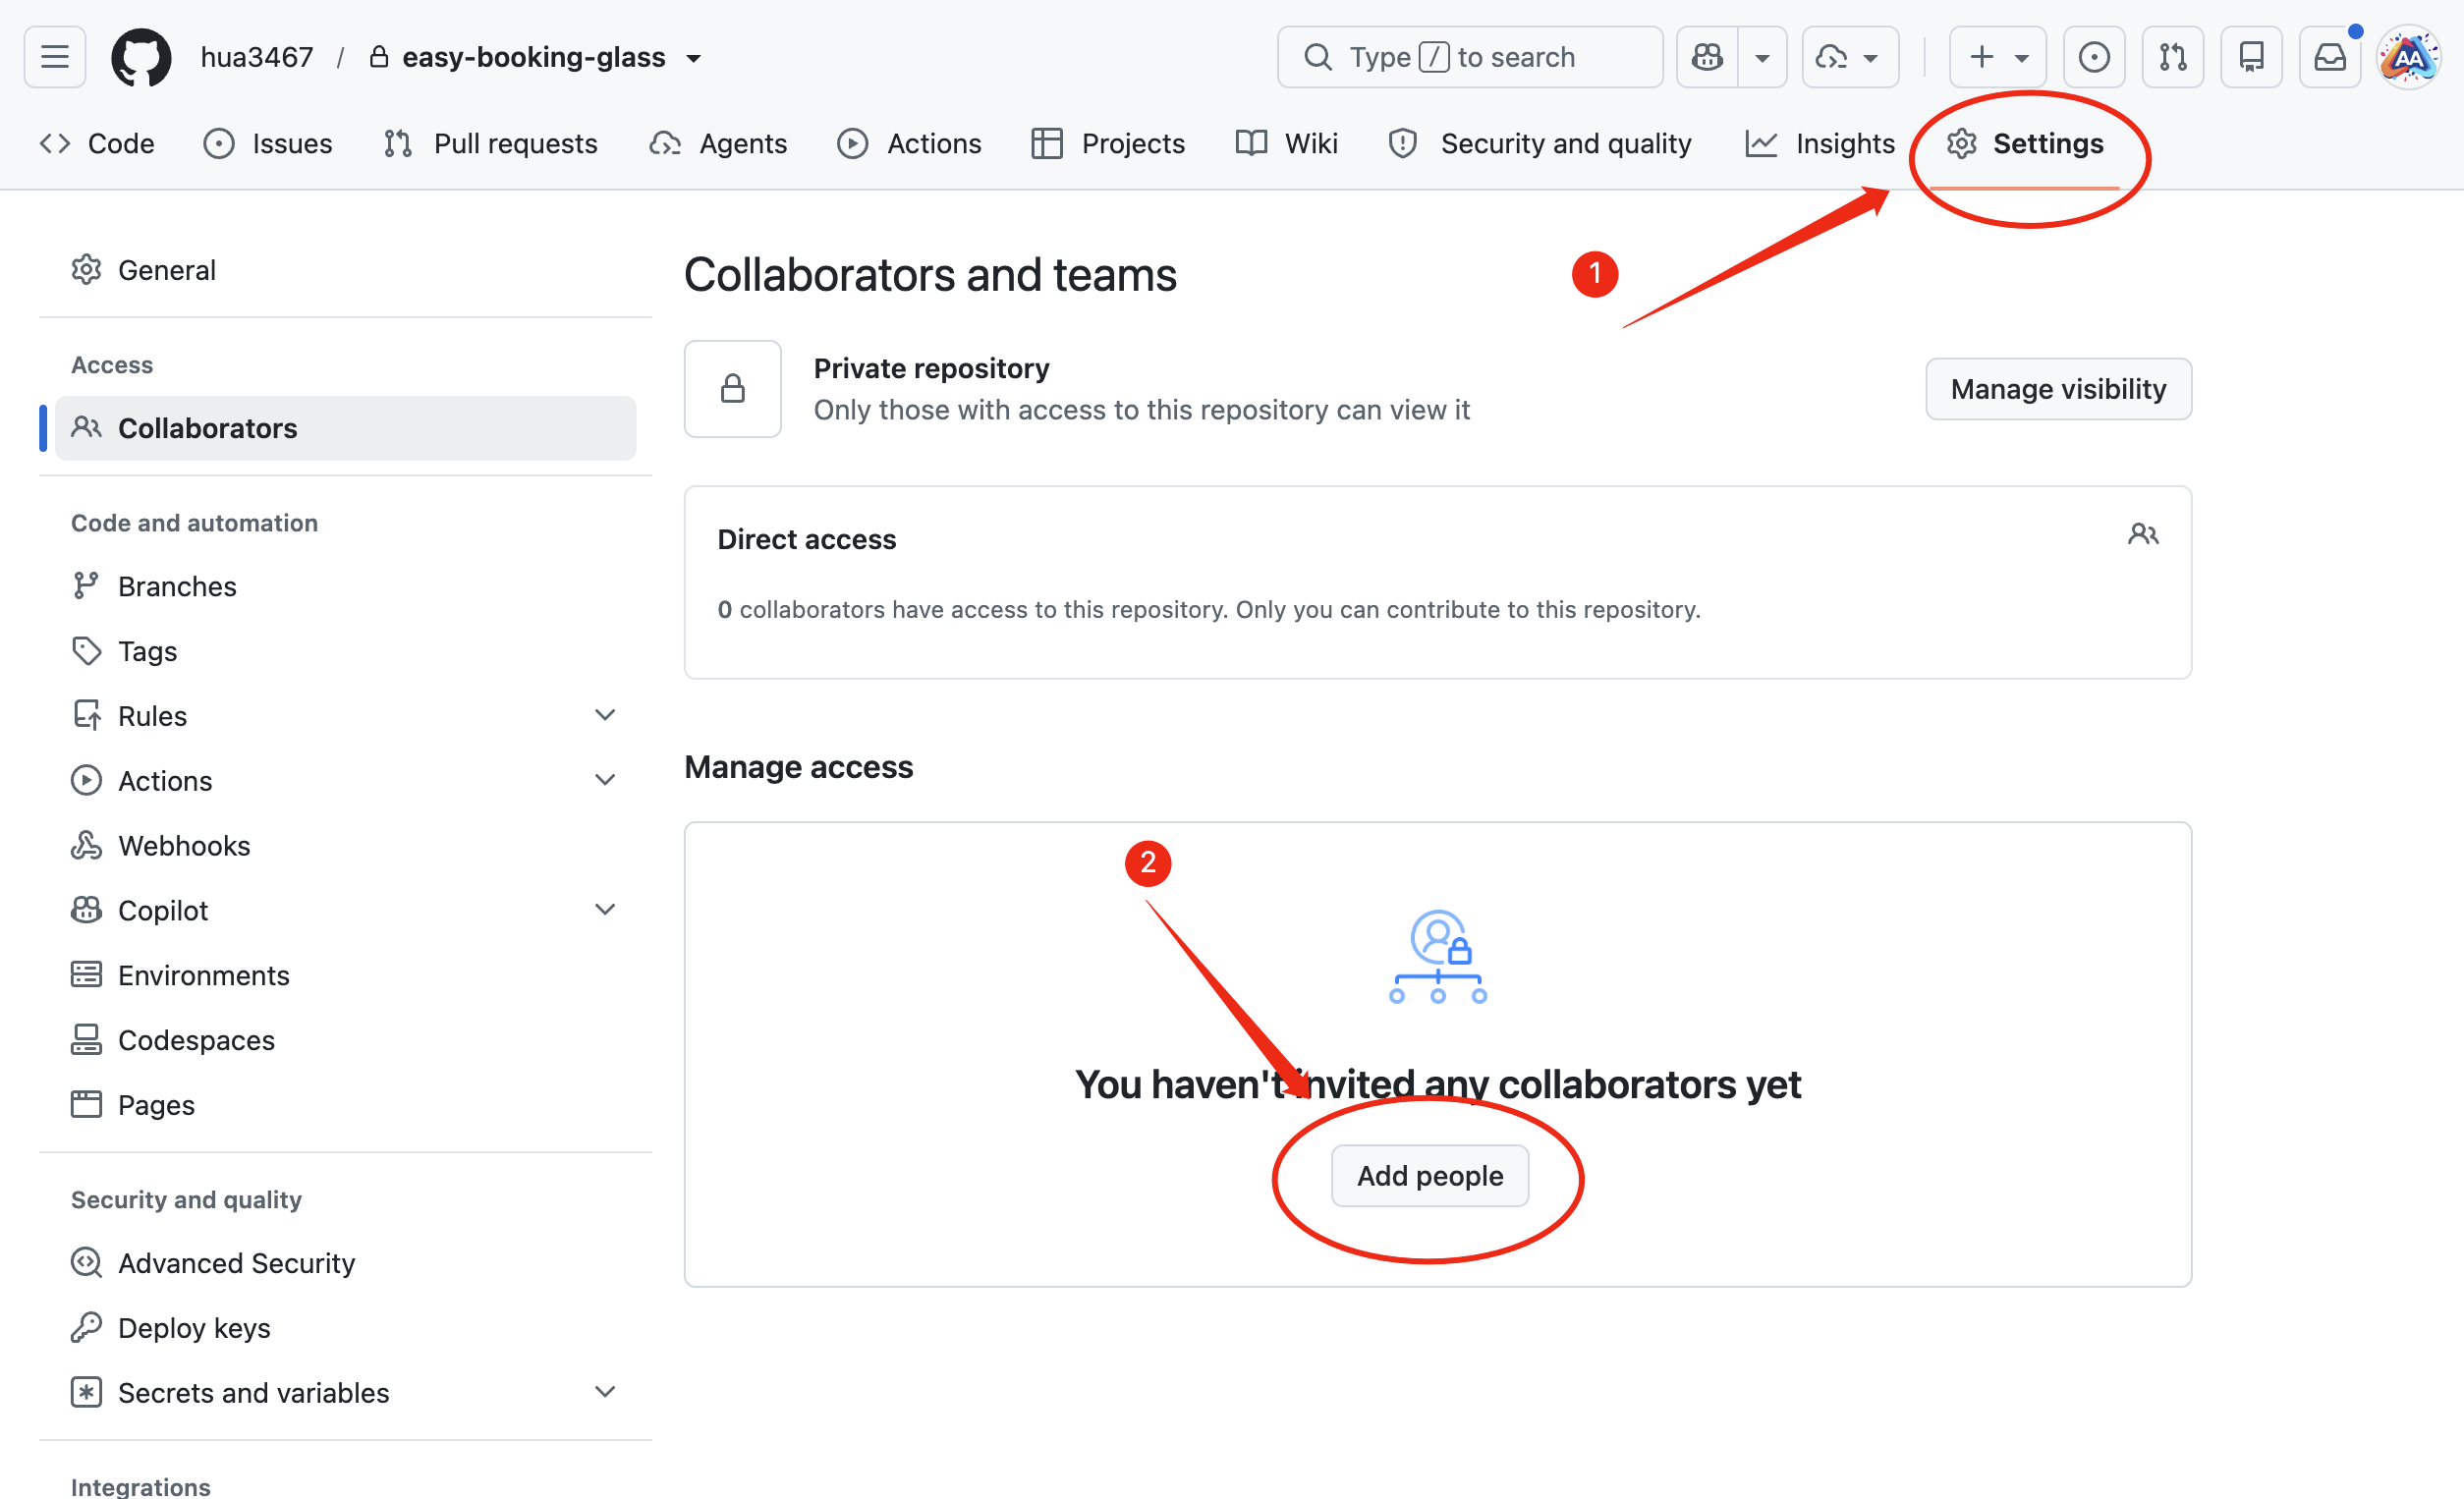
Once your project is pushed to GitHub, you can invite collaborators to your repository. This allows your instructor to download and test your project. Follow the steps shown below to add a collaborator.
Step 1: Go to your repository on GitHub:
Step 2: Go to the "Settings" tab of your repository web page/Collaborators, then add people:
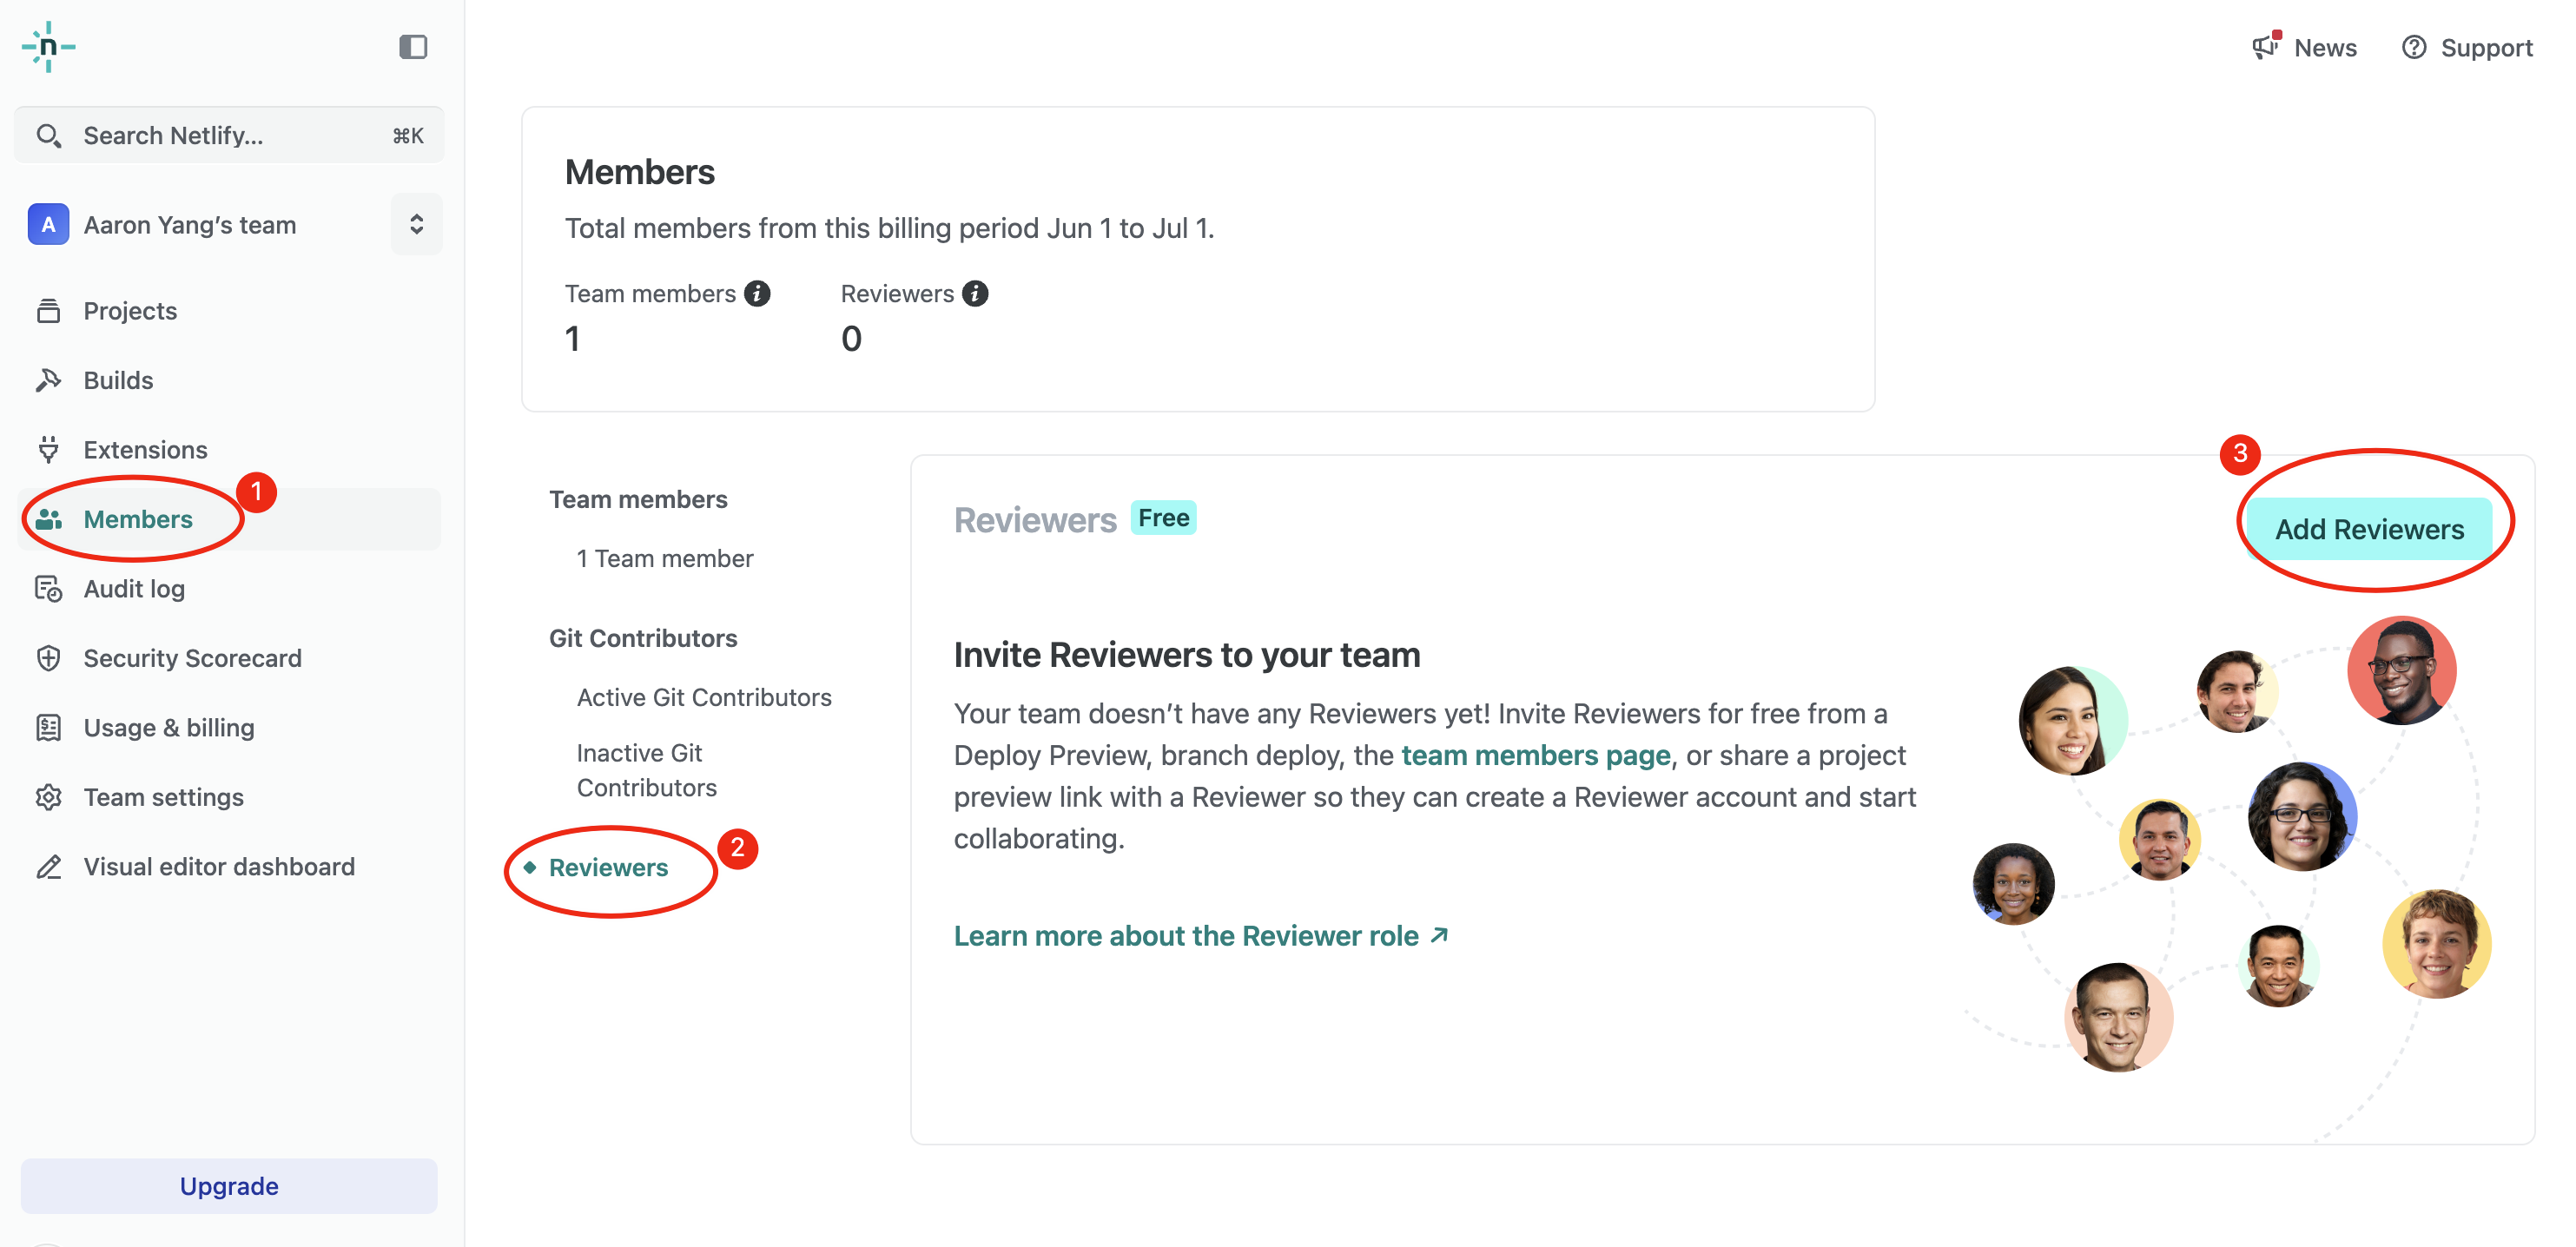
Invite a Reviewer to Your Netlify Project
Once your project is deployed on Netlify from GitHub, you can invite reviewers to your Netlify project for free. This makes it easier for your instructor to view your deployed site and provide feedback directly. Follow the steps shown below to add a reviewer.
Step 1: Go to dashboard of your Netlify account (not project):
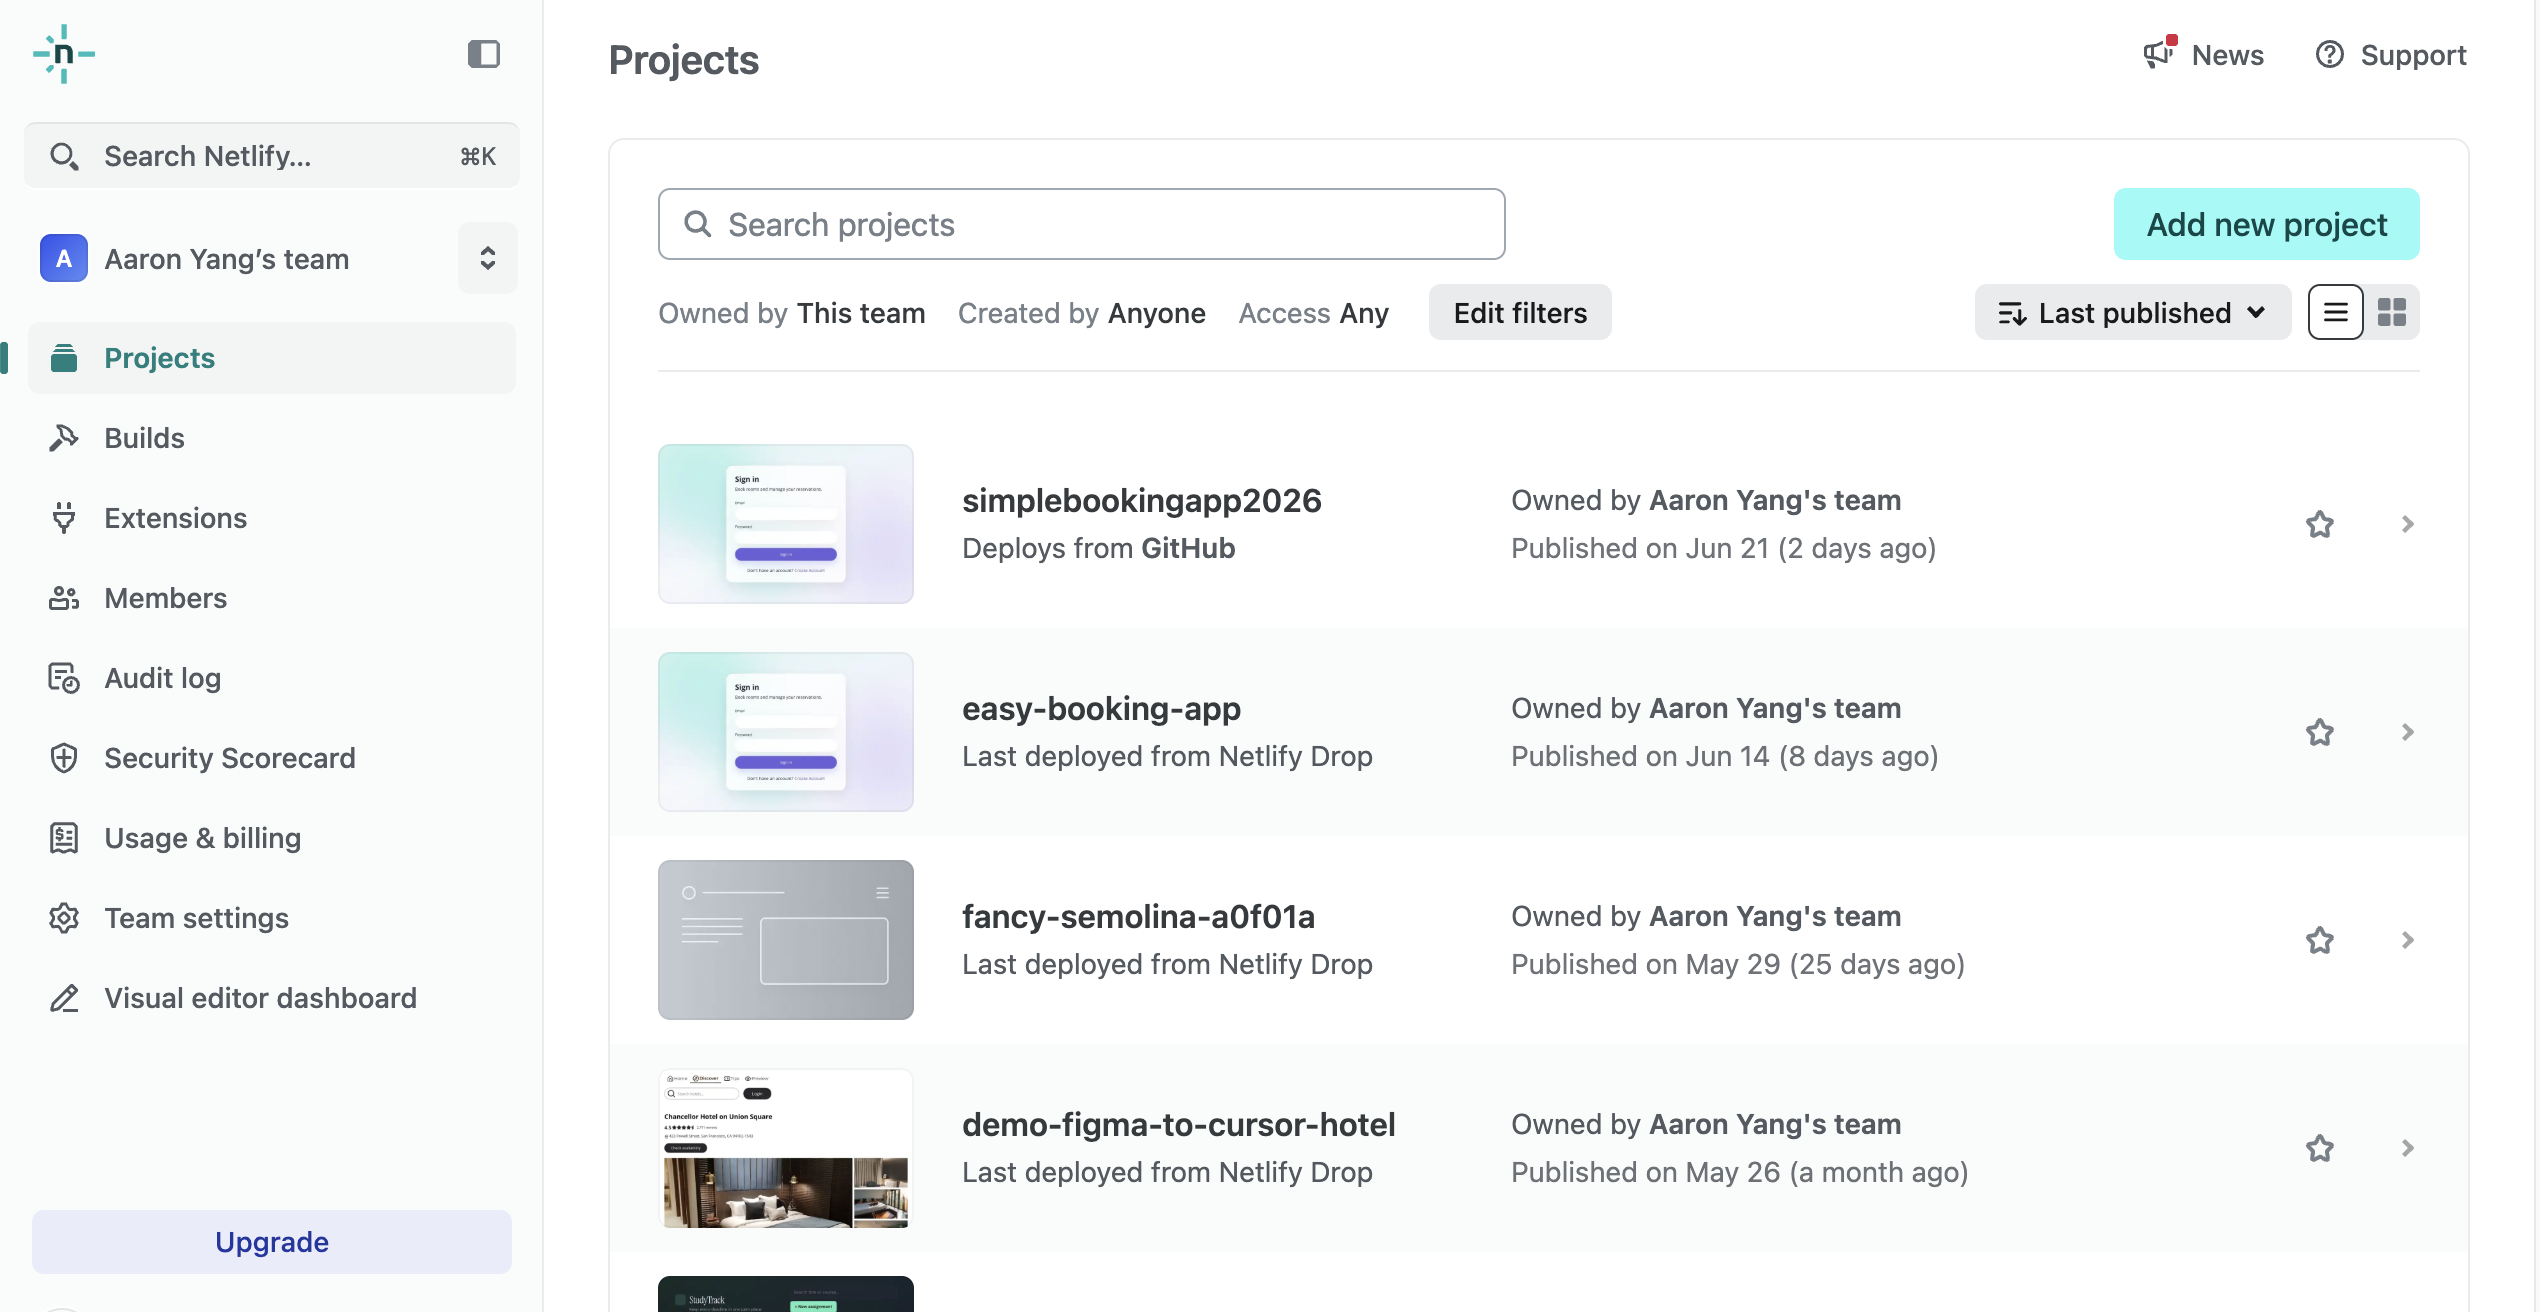
Step 2: Select Members -> Reviewers -> Add Reviewers:
What to Do This Week
NOTE
This week does not have a mini project. Please complete the course project.
Course Project
- Complete the course project and make it fully functional.
- Create a GitHub account, and push your project to your account. Then, invite me to your project repository as a collaborator in GitHub using my email: aayang@iastate.edu. See here for instruction
- Deploy your course project to Netlify or similar web services from GitHub. If possible, invite me to your deployed project so that it would be easier to provide feedback. See here for instruction.
- Create a new page in your Figma project file for this week's work. Then add screenshots of ~15 prompts and your published site.
- You don't need to submit anything to Canvas this week.